---
title: Getting started with Neon Local and Neon Local Connect
subtitle: Learn how to set up and use Neon Local and Neon Local Connect for seamless local development with Neon
author: 'dhanush-reddy'
enableTableOfContents: true
createdAt: '2025-08-17T00:00:00.000Z'
updatedOn: '2025-08-17T00:00:00.000Z'
---
One of Neon's most powerful features is database branching, the ability to instantly create isolated, copy-on-write clones of your database for any task. Just as you create a Git branch for every new feature or bug fix, you can create a parallel database branch. This eliminates environment drift, prevents developers from overwriting each other's work on shared staging databases, and ensures every development environment is a perfect, isolated replica of production.
But how do you bring this cloud-native power into your local development workflow seamlessly? Constantly switching connection strings for each branch is tedious and error-prone. This is the problem that **Neon Local** and the **Neon Local Connect** VS Code extension solve. They act as a smart local proxy to your Neon database in the cloud. Your application connects to a single, static `localhost` address, while the tools handle all the complexity of routing and branch management behind the scenes.
This guide will walk you through setting up and using both Neon Local and Neon Local Connect to create a powerful, modern development workflow. You'll learn how to:
- Install and configure the Neon Local Connect extension in VS Code.
- Utilize the built-in Schema Viewer, SQL Editor, and Table Editor.
- Connect your local application to a Neon database using a single, static `localhost` connection string.
- Manage database branches (create, switch, reset) directly from your IDE.
- Use Neon Local with Docker Compose for CI/CD or non-VS Code environments.
This guide focuses on **Neon Local**, a **local proxy** for your **cloud-hosted Neon Postgres database**. It enables you to use Neon's powerful branching features with a convenient `localhost` connection, allowing you to seamlessly switch between branches, create new branches, and manage them directly from your IDE.
This is different from [Local Development with Neon](/guides/local-development-with-neon) guide, which shows you how to run a completely separate, **local instance of Postgres** for fully offline development.
For most modern workflows that leverage Neon's features, the proxy-based approach in this guide is recommended.
## Prerequisites
Before you begin, ensure you have the following:
- **Neon account:** A free Neon account. If you don't have one, sign up at [Neon](https://console.neon.tech/signup).
- **VS Code:** Or any compatible editor based on VS Code, such as Cursor or Windsurf.
- **Docker:** Docker Desktop must be installed and running on your machine. You can download it from [docker.com](https://www.docker.com/products/docker-desktop/).
- **Node.js:** Version `18` or later to run the example application.
## Neon Local Connect
The easiest way to get started is with the Neon Local Connect VS Code extension. It manages the underlying Docker container for you, providing a full control panel for your Neon database within your editor.
### Install the extension
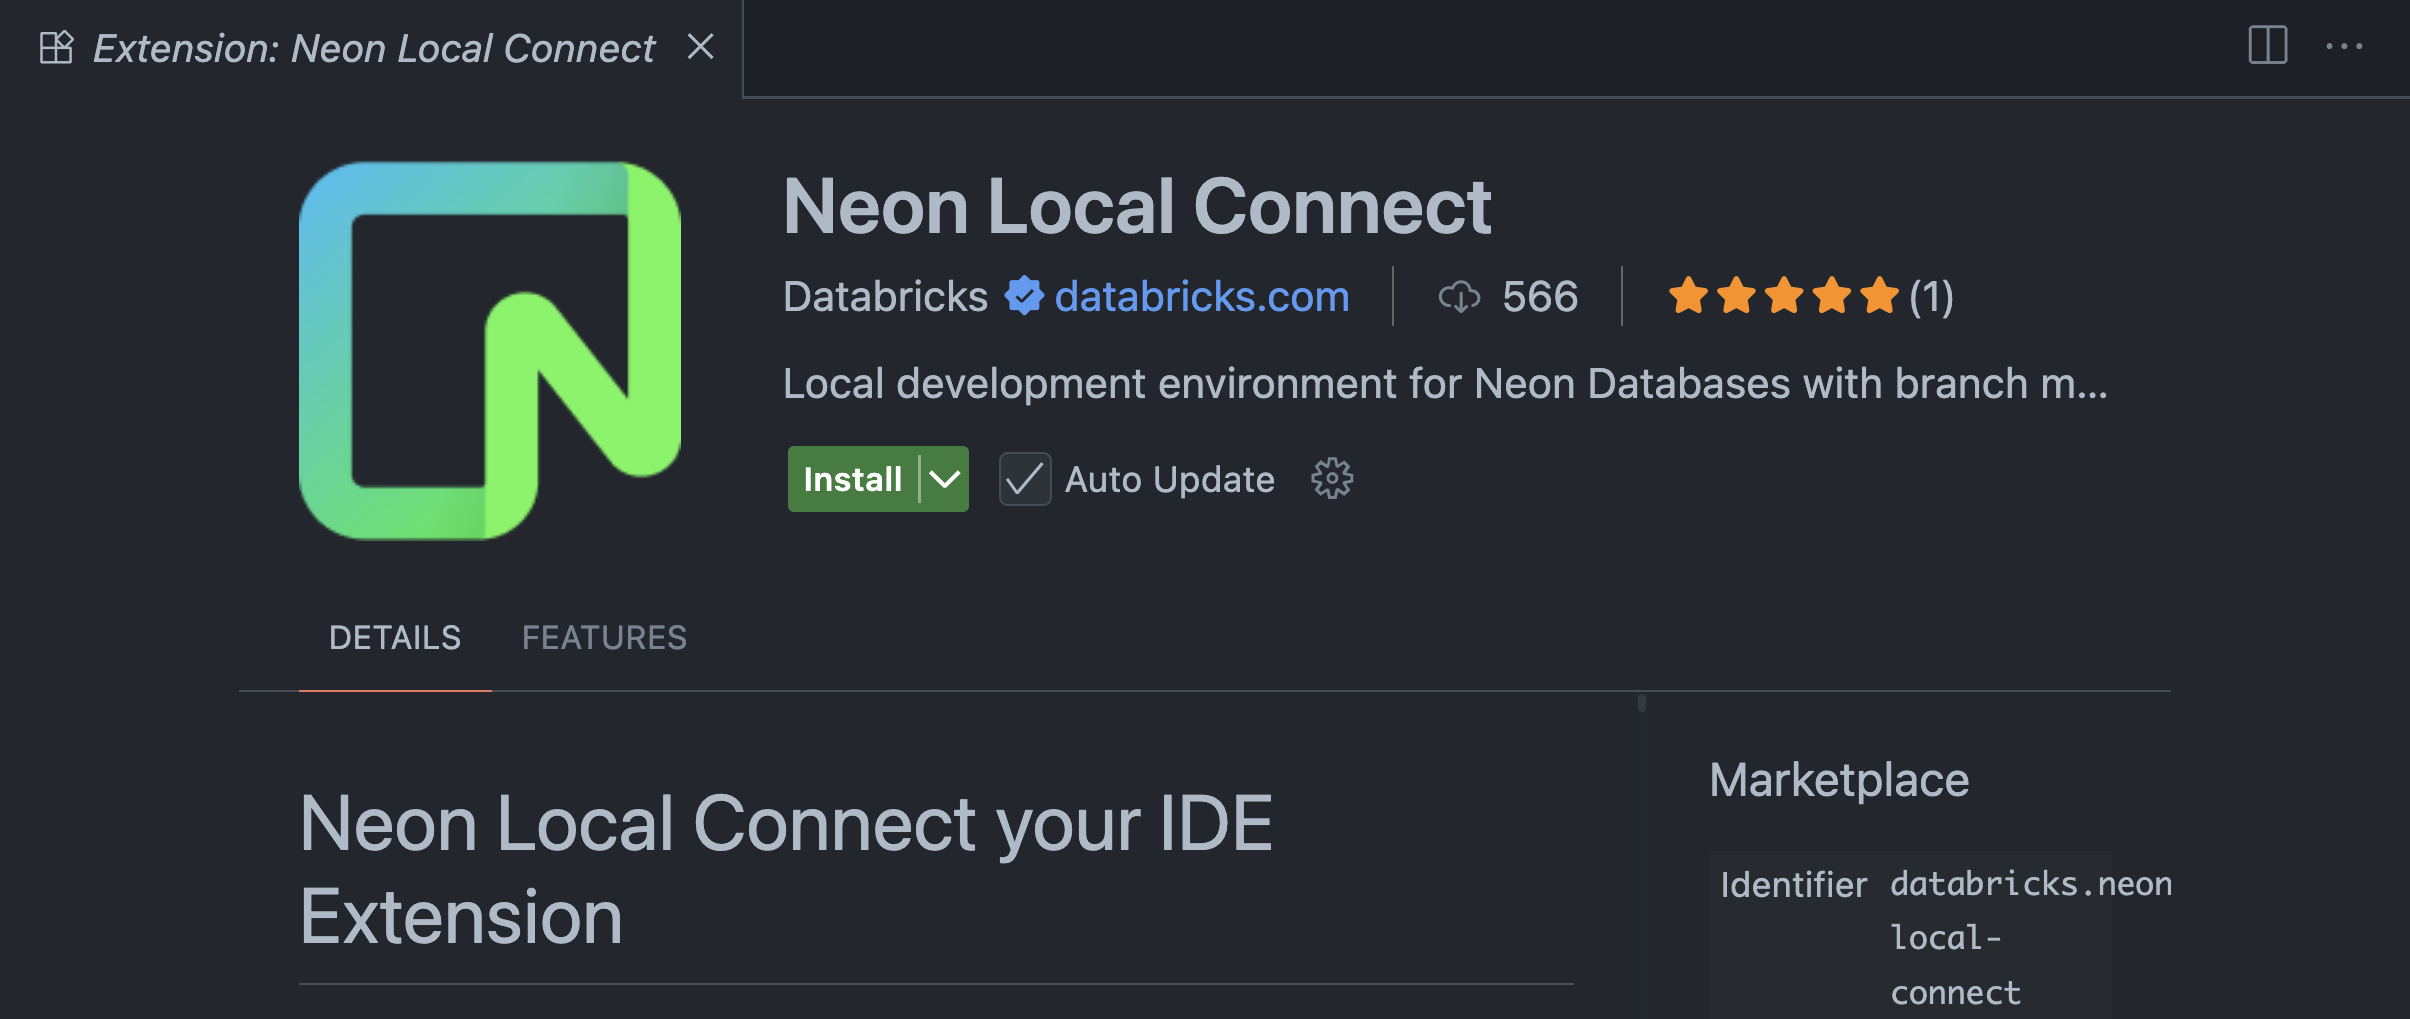
First, install the extension from the Visual Studio Marketplace or OpenVSX.
1. Open your editor and navigate to the **Extensions** view (`Ctrl+Shift+X` or `Cmd+Shift+X`).
2. Search for "Neon Local Connect".
3. Click **Install**.
You can also install it directly from the marketplace:
VS Code Marketplace
OpenVSX Marketplace
### Connect to your Neon account
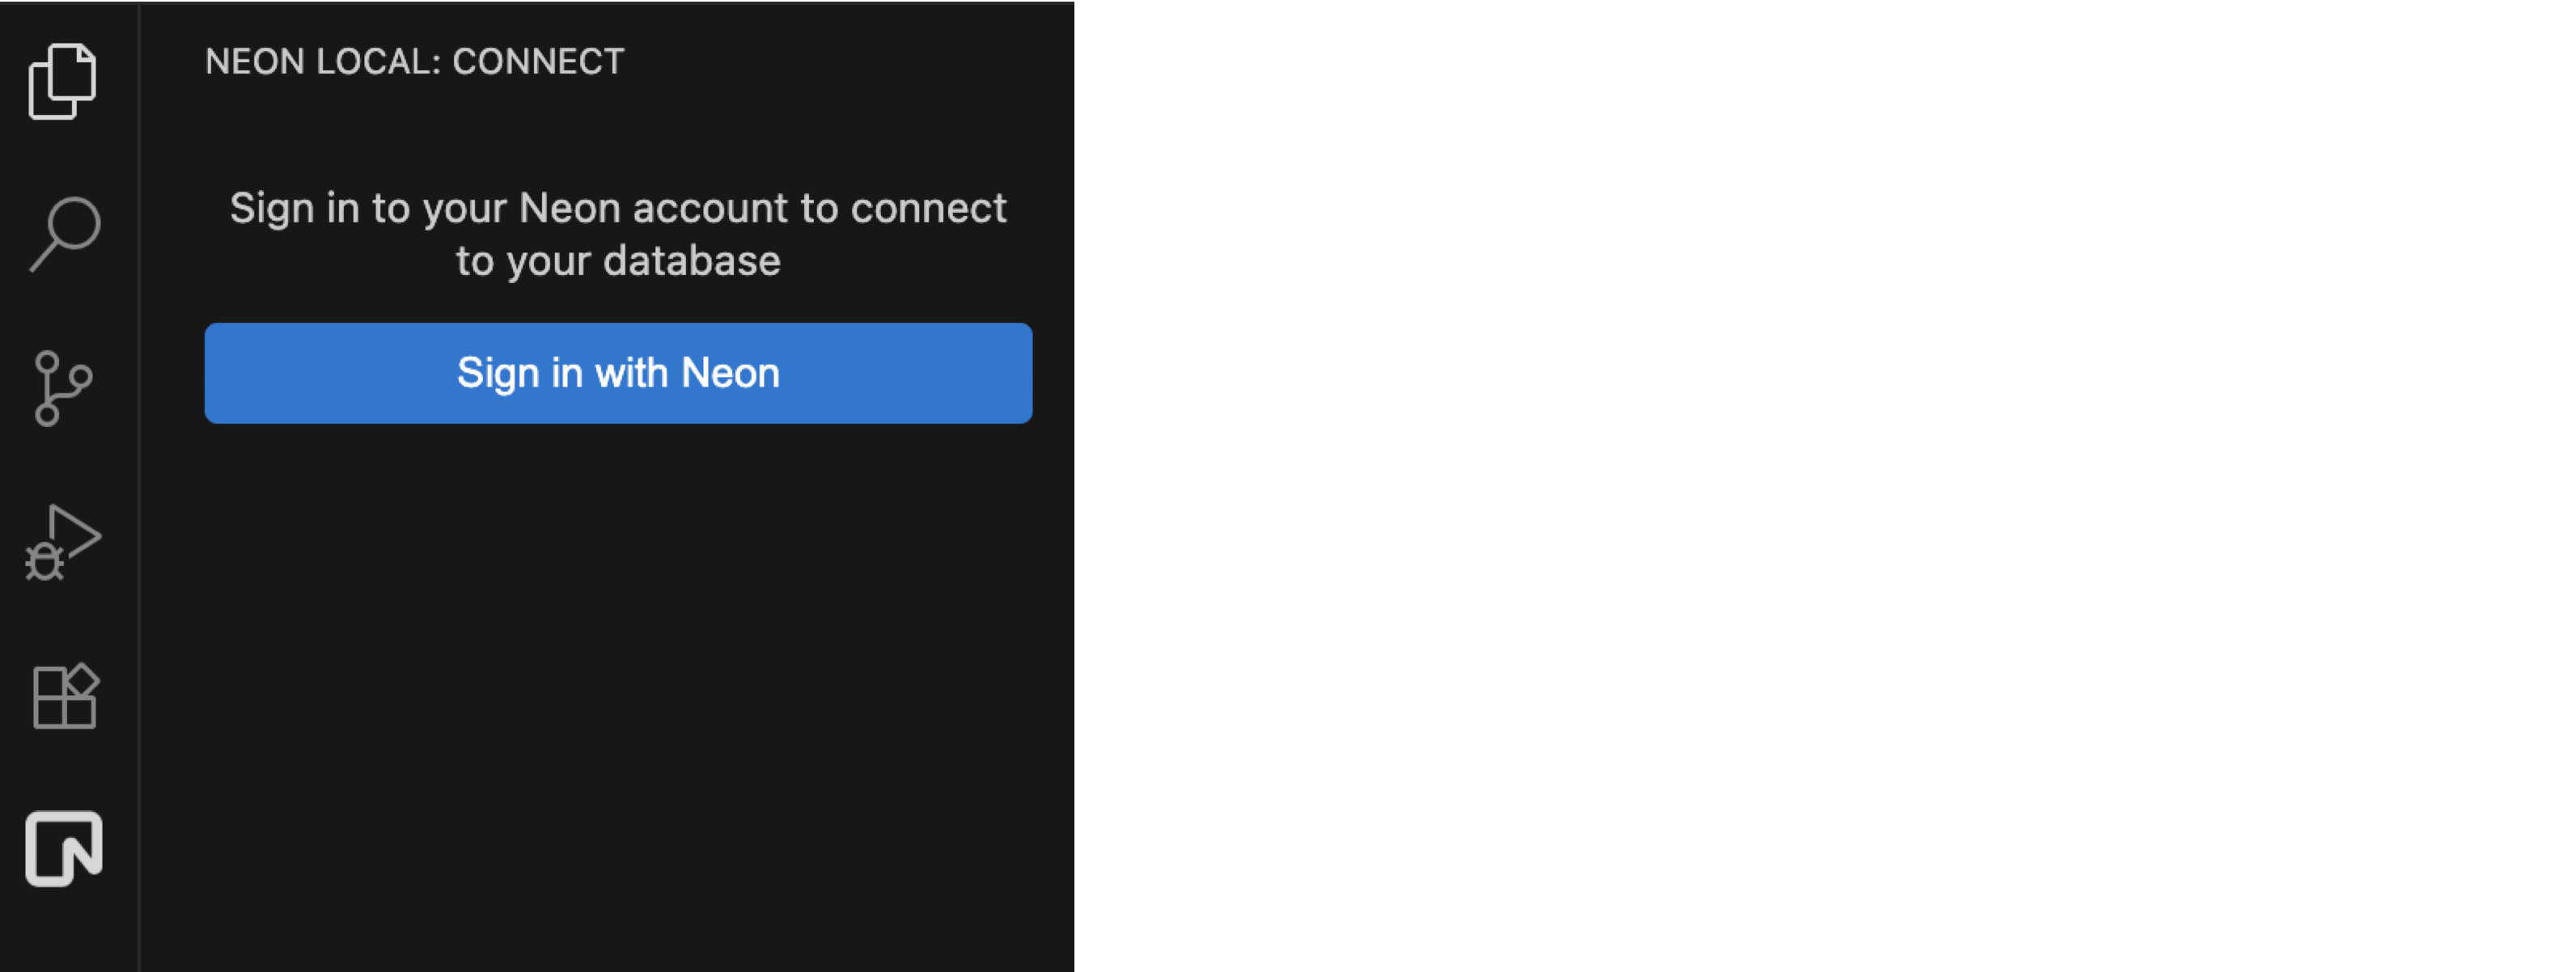
Once installed, a new Neon icon will appear in your Activity Bar.
1. Click the Neon icon to open the Neon Local Connect panel.
2. Click **Sign in with Neon**. This will open a browser window to authenticate your Neon account using OAuth.
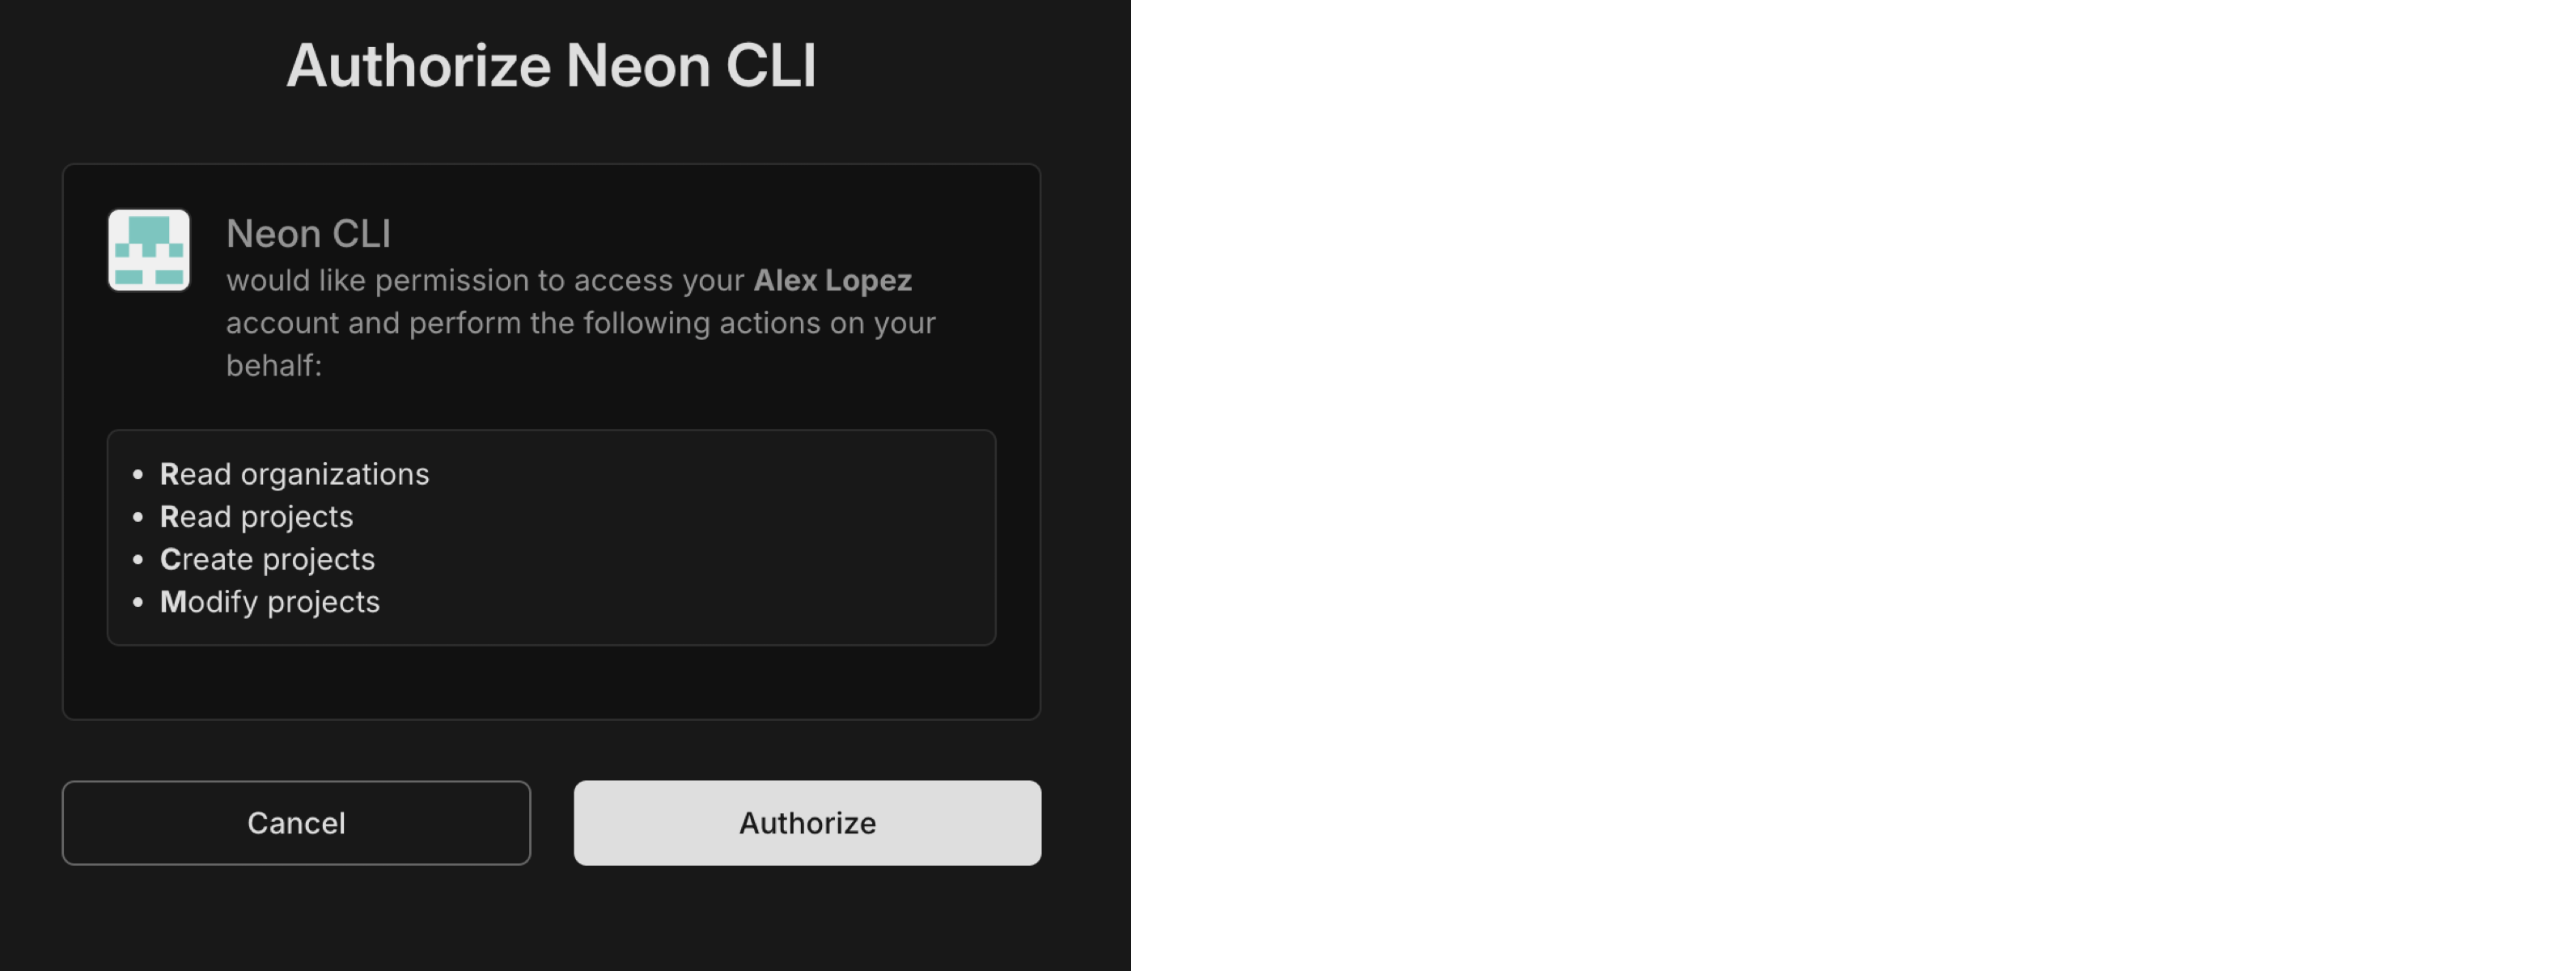
3. Authorize the application to connect to your Neon account.
### Connect to a Database branch
After authenticating, the extension fetches your Neon projects and branches.
1. Select your **Organization** and **Project**.
2. Choose the **Branch** you want to work on (e.g., `development`). You can connect to an **existing branch** or an **ephemeral branch** that is created on connection and destroyed on disconnection.
For using ephemeral branches, you need to authenticate using a Neon API key. This is recommended to ensure that temporary branches are automatically cleaned up when your session ends. To get started, see [Creating API keys](/docs/manage/api-keys). In the Neon Local Connect panel, click **Import API Key** to add your key.
3. Click **Connect**.
The extension will now start a Neon Local Docker container in the background and establish a proxy connection to your selected branch. Once connected, the panel will display a static, local connection string.
The connection string will always be the same, regardless of which branch you connect to:
`postgres://neon:npg@localhost:5432/`
### Extension features
Neon Local Connect turns your IDE into a powerful database management tool, eliminating the need to switch contexts.
#### Database schema view
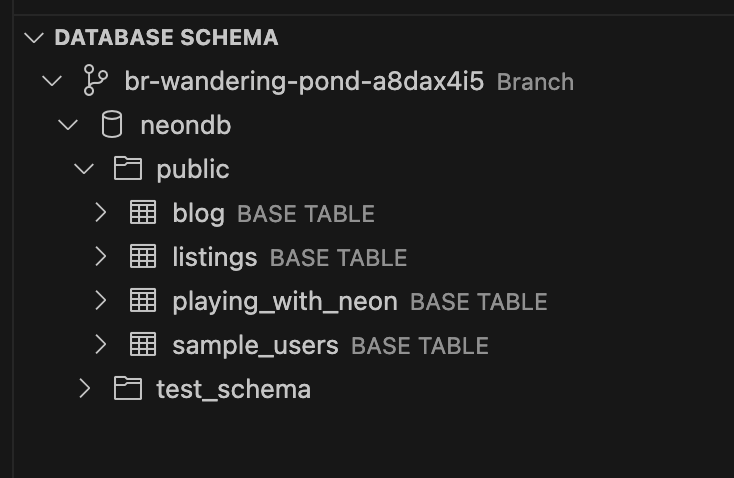
Once connected, a **Database Schema** view appears in the sidebar. This tree view lets you explore your entire database structure: databases, schemas, tables, columns, and relationships (PKs, FKs). Right-click any table for quick actions like **Query Table**, **View Table Data**, **Truncate**, or **Drop**.
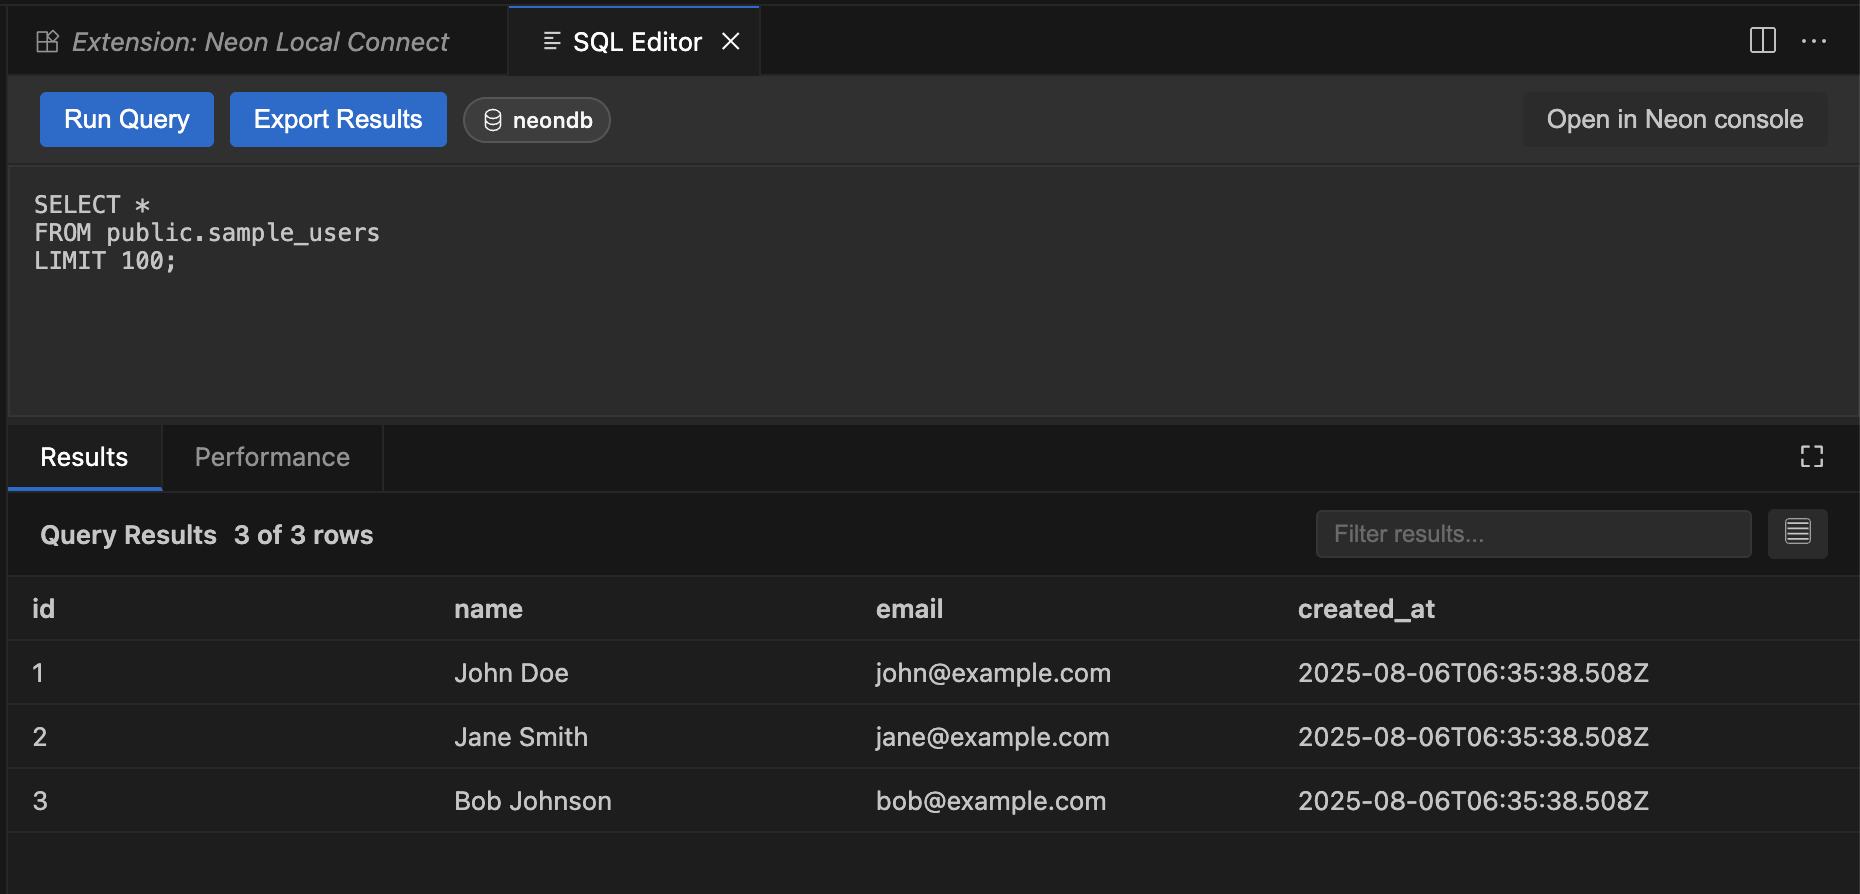
#### Built-in SQL editor
Execute queries directly in your IDE. Right-click a table and select "Query Table" to open a pre-filled `SELECT *` query, or open a blank editor from the command palette.
- **View results** in a filterable, sortable table.
- **Export data** to CSV/JSON.
- **See performance stats** and detailed error messages.
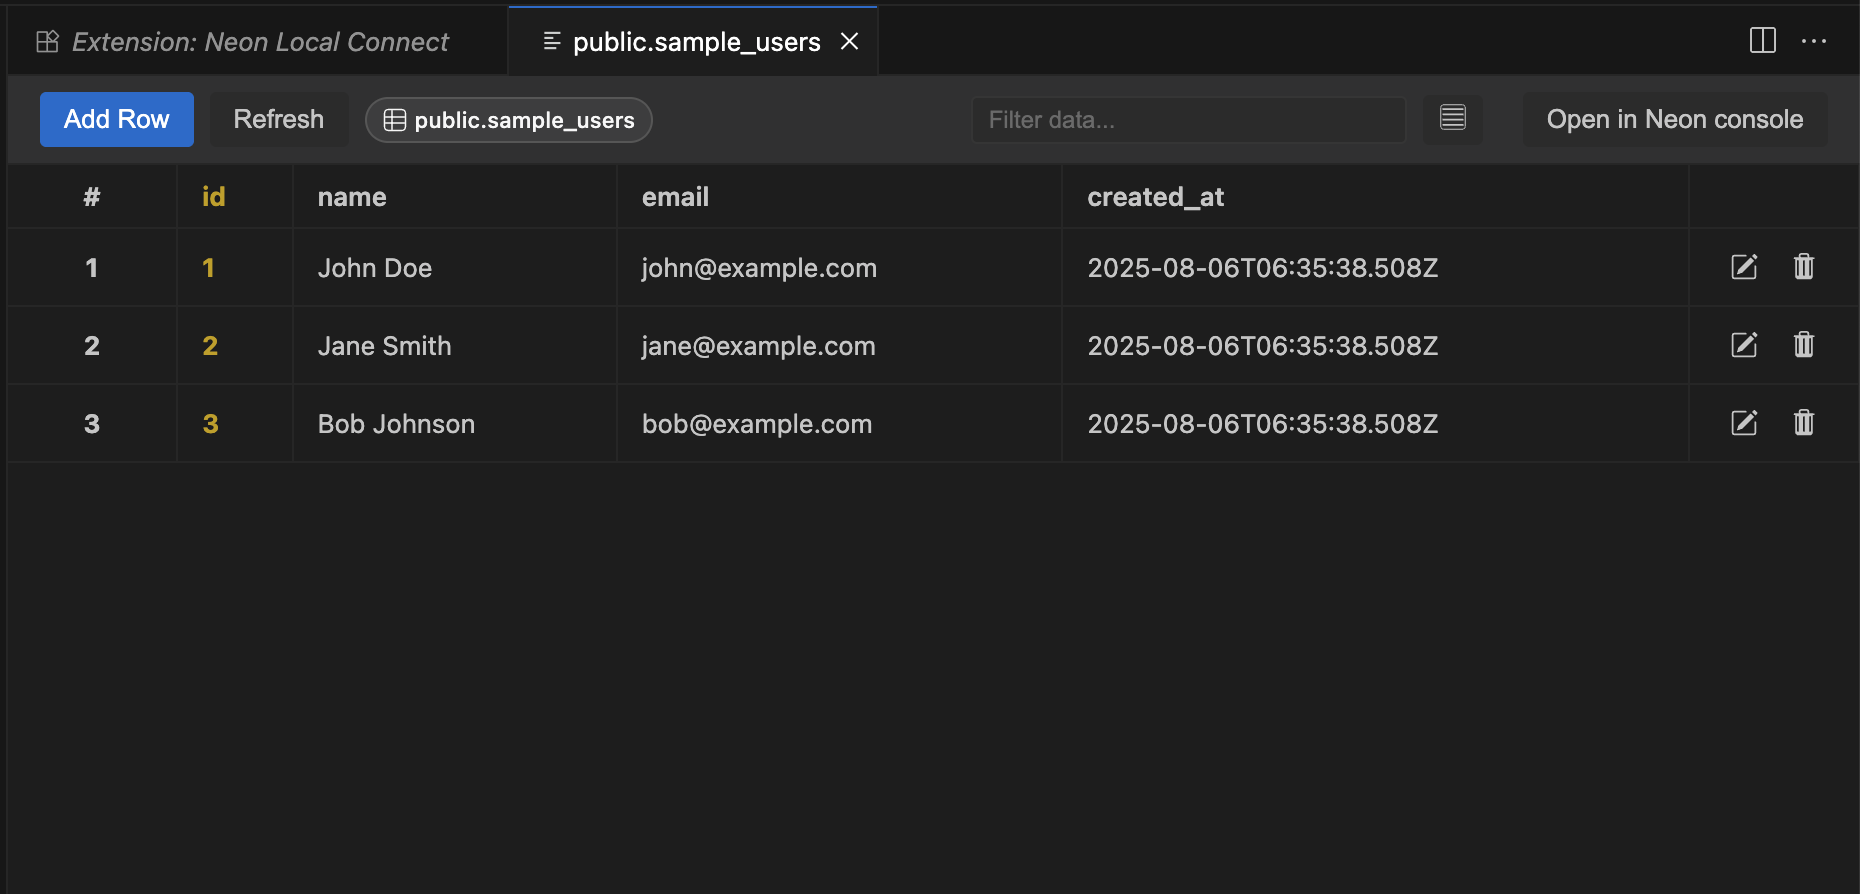
#### Table data management
For quick edits, right-click a table and select "View Table Data" to open a spreadsheet-like interface.
- **Edit rows** by clicking the pen (edit) icon next to any row (requires a primary key).
- **Insert and delete rows** with dedicated buttons.
- **Paginate** through large datasets.
- Changes are applied to your database immediately.
#### Branch management from the panel
The Neon Local Connect panel also provides easy branch management:
- **Create a new branch:** Click the "Branch" dropdown, select "Create new branch...", give it a name, and choose a parent.
- **Switch branches:** Simply select a different branch from the dropdown. Your `localhost` connection will now point to the new branch no code changes needed.
- **Reset a branch:** Revert a branch to its parent's state to discard changes and get a clean slate. To reset a branch, right click the branch in **Database schema view** and select "Reset from Parent Branch".

### Connect your application
Add the static connection string from the extension panel to your project's `.env.local` file.
```ini
DATABASE_URL="postgres://neon:npg@localhost:5432/"
```
> Replace `` with your actual database name
Your app now connects to `localhost:5432`, and Neon Local securely routes traffic to the active cloud branch.
Follow the [Typical development workflow](#typical-development-workflow) section for understanding how to leverage Neon Local effectively.
## Neon Local
For non-VS Code users or CI/CD integration, you can use Neon Local directly. This gives you the same power, controlled in a programmatic way.
Neon Local is a Docker-based proxy that connects to your Neon database, allowing you to run a local instance of your cloud database. It provides a static connection string (`localhost:5432`) that routes to the active branch, making it easy to switch branches without changing your code.
### Docker compose configuration
Here is a `docker-compose.yml` that defines your `app` and the `db` (Neon Local) service.
```yaml
services:
app:
build: .
ports:
- '${PORT}:${PORT}'
environment:
- DATABASE_URL="postgres://neon:npg@db:5432/${DB_NAME}?sslmode=no-verify"
depends_on:
- db
db:
image: neondatabase/neon_local:latest
ports:
- '5432:5432'
environment:
- NEON_API_KEY=${NEON_API_KEY}
- NEON_PROJECT_ID=${NEON_PROJECT_ID}
# Choose one of the following:
- BRANCH_ID=${BRANCH_ID} # For existing branches
# - PARENT_BRANCH_ID=${PARENT_BRANCH_ID} # For ephemeral branches
```
#### Key environment variables
| Variable | Description | Required | Default |
| ------------------ | ----------------------------------------------------------------------------------------- | -------- | ------------------------ |
| `NEON_API_KEY` | Your Neon API key. | Yes | N/A |
| `NEON_PROJECT_ID` | Your Neon project ID. | Yes | N/A |
| `BRANCH_ID` | Connects to a specific existing branch. Mutually exclusive with `PARENT_BRANCH_ID`. | No | N/A |
| `PARENT_BRANCH_ID` | Creates an ephemeral branch from a parent. If omitted, uses the project's default branch. | No | Project's default branch |
| `DELETE_BRANCH` | Set to `false` to prevent branches from being deleted when the container stops. | No | `true` |
If you need to use the `docker run` command instead of Docker Compose, you can checkout [Neon Local Docs](/docs/local/neon-local) for more information.
### Advanced configuration
#### Persistent branches per Git Branch
For a workflow where a database branch's lifecycle matches a Git branch, you can configure Neon Local to persist its state.
Add `volumes` to your `db` service in `docker-compose.yml`:
```yaml
db:
image: neondatabase/neon_local:latest
ports:
- '5432:5432'
environment:
NEON_API_KEY: ${NEON_API_KEY}
NEON_PROJECT_ID: ${NEON_PROJECT_ID}
DELETE_BRANCH: false
volumes:
- ./.neon_local/:/tmp/.neon_local
- ./.git/HEAD:/tmp/.git/HEAD:ro,consistent
```
This configuration uses your current Git branch name to manage a persistent database branch.
This will create a `.neon_local` directory in your project to store metadata. Be sure to add `.neon_local/` to your `.gitignore` to avoid committing database information.
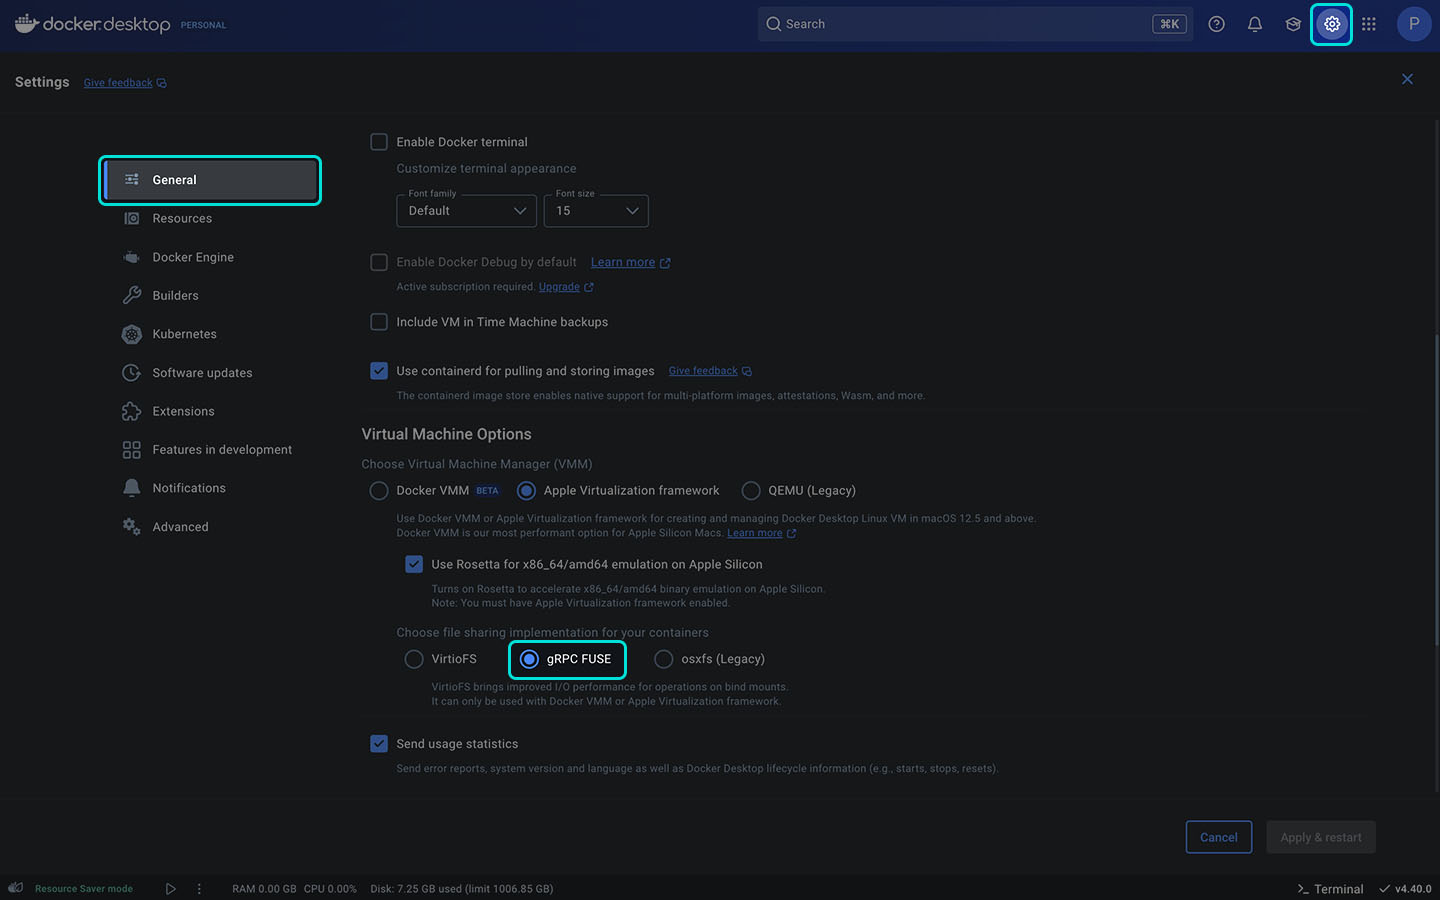
If using Docker Desktop for Mac, ensure that your VM settings use **gRPC FUSE** instead of **VirtioFS**. There is currently a known bug with VirtioFS that prevents proper branch detection and live updates inside containers.
## Typical development workflow
Neon's branching is designed to integrate seamlessly with modern, Git-based development workflows. By pairing each Git branch with a corresponding database branch, you can ensure complete isolation, prevent conflicts, and maintain a clean production database.
Here’s a practical look at how to use Neon Local in your daily tasks.
#### The scenario: Starting a new task
You've just been assigned a ticket to build a new user profile page. The first step is always to create a new Git branch to isolate your code changes.
```bash
git checkout main
git pull
git checkout -b feature/new-user-profile
```
Now that your code is isolated, you need to isolate your database. You have two primary options depending on the scope of your task.
#### Option 1: Long-lived feature
**When to use it:** This is the standard approach for most feature work, bug fixes that require review, or any task that will span multiple sessions or involve collaboration. You create a persistent database branch that mirrors the lifecycle of your Git branch.
With the VS Code extension, creating a persistent branch is trivial:
1. In the Neon Local Connect panel, click the **Branch** dropdown menu.
2. Select **Create new branch...**.
3. Enter a name for your branch. It's good practice to match your Git branch name, like `feature/new-user-profile`.
4. Choose a parent branch to copy data and schema from (e.g., `production` or `development`).
5. The extension will instantly create the branch and connect you to it. Your `localhost` connection now points to this new, isolated environment.
When using the CLI, you create the branch in the Neon Console and then configure Neon Local to connect to it.
1. Navigate to your project in the **[Neon Console](https://console.neon.tech/)**.
2. Go to the **Branches** tab and click **New Branch**.
3. Name the branch (`feature/new-user-profile`) and select a parent.
4. Once created, copy the **Branch ID** from the branch details.
5. In your `docker-compose.yml`, ensure the `db` service is configured to use this specific `BRANCH_ID`.
```yaml
services:
db:
# ... other settings
environment:
- NEON_API_KEY=${NEON_API_KEY}
- NEON_PROJECT_ID=${NEON_PROJECT_ID}
- BRANCH_ID= # Connect to the specific branch
```
6. Run `docker compose up` to start the proxy connected to your new feature branch.
#### Option 2: Quick experiment or test
**When to use it:** Perfect for quick bug fixes, running a single test suite, or experimenting with a schema change that you might throw away. An ephemeral branch is created on-the-fly and automatically deleted when you're done.
1. In the Neon Local Connect panel, click the **Connection Type** dropdown menu.
2. Instead of selecting "Connect to Neon Branch", choose **Connect to ephemeral Neon branch** option.
3. Under **Branch**, select a parent branch (e.g., `production`) to base the ephemeral branch on.
4. Click **Connect**.
The extension creates a temporary branch for your session. When you click **Disconnect**, the branch and all its changes are automatically deleted from your Neon project, leaving no trace.
For using ephemeral branches, you need to authenticate using a Neon API key. To get started, see [Creating API keys](/docs/manage/api-keys).
With the CLI, you create an ephemeral branch by specifying a `PARENT_BRANCH_ID` instead of a `BRANCH_ID`.
1. In the **[Neon Console](https://console.neon.tech/)**, find the **Branch ID** of the branch you want to use as a parent (e.g., your `production` or `development` branch).
2. In your `docker-compose.yml`, configure the `db` service to use this parent ID.
```yaml
services:
db:
# ... other settings
environment:
- NEON_API_KEY=${NEON_API_KEY}
- NEON_PROJECT_ID=${NEON_PROJECT_ID}
- PARENT_BRANCH_ID= # Create ephemeral branch from this parent
```
3. Run `docker compose up`. Neon Local will create a new, temporary branch from this parent.
4. When you're finished, run `docker compose down`. The ephemeral branch will be automatically deleted from your Neon project.
## Connecting your application conditionally
Your application code needs to seamlessly switch between connecting to Neon Local for development and your live Neon database for production. The standard way to manage this is by using the `NODE_ENV` environment variable.
The core logic is straightforward: when `process.env.NODE_ENV` is set to `'development'`, your application should use the static `localhost` connection string provided by Neon Local. For any other environment (such as `'production'` on platforms like Vercel, AWS, or other cloud providers), your app should use the actual Neon database URL, typically stored in your deployment environment's configuration or secrets on your cloud provider.
The implementation details vary slightly depending on the database driver or ORM you are using.
The Neon serverless driver is designed to communicate with a Neon database over HTTP/WebSocket. To redirect this traffic to your local Neon Local proxy, you must override its default behavior in your development environment.
This is done by reconfiguring `neonConfig` to point to `localhost`.
1. Install Dependencies
```bash
npm install @neondatabase/serverless ws
```
```bash
yarn add @neondatabase/serverless ws
```
```bash
pnpm add @neondatabase/serverless ws
```
2. **Configure the connection**
```typescript
import { neon, neonConfig, Pool } from '@neondatabase/serverless';
import ws from 'ws';
let connectionString =
process.env.DATABASE_URL || 'postgres://neon:npg@localhost:5432/';
if (process.env.NODE_ENV === 'development') {
// Point the serverless driver to the local proxy
neonConfig.fetchEndpoint = 'http://localhost:5432/sql';
neonConfig.poolQueryViaFetch = true;
}
// Use the WebSocket constructor for Node.js
neonConfig.webSocketConstructor = ws;
// Neon supports both HTTP and WebSocket clients. Choose the one that fits your needs:
// HTTP Client (sql)
// - Best for serverless functions and Lambda environments
// - Ideal for stateless operations and quick queries
// - Lower overhead for single queries
// - Better for applications with sporadic database access
export const sql = neon(connectionString);
// WebSocket Client (pool)
// - Best for long-running applications (like servers)
// - Maintains a persistent connection
// - More efficient for multiple sequential queries
// - Better for high-frequency database operations
export const pool = new Pool({ connectionString });
```
> If you’re using `drizzle-orm` with the standard Postgres wire protocol (not the Neon serverless adapter), refer to the **Other drivers** section.
Using Drizzle with Neon’s serverless adapters requires a similar setup to the one used for the Neon serverless driver directly: configure `neonConfig` to point to your local Neon Local proxy.
1. Install Dependencies
```bash
npm install drizzle-orm @neondatabase/serverless ws
```
```bash
yarn add drizzle-orm @neondatabase/serverless ws
```
```bash
pnpm add drizzle-orm @neondatabase/serverless ws
```
2. **Configure the connection**
```typescript
import { neon, neonConfig, Pool } from '@neondatabase/serverless';
import { drizzle as drizzleWs } from 'drizzle-orm/neon-serverless';
import { drizzle as drizzleHttp } from 'drizzle-orm/neon-http';
import ws from 'ws';
let connectionString =
process.env.DATABASE_URL || 'postgres://neon:npg@localhost:5432/';
if (process.env.NODE_ENV === 'development') {
// Point the serverless driver to the local proxy
neonConfig.fetchEndpoint = 'http://localhost:5432/sql';
neonConfig.poolQueryViaFetch = true;
}
// Use the WebSocket constructor for Node.js
neonConfig.webSocketConstructor = ws;
const sql = neon(connectionString);
const pool = new Pool({ connectionString });
// Drizzle supports both HTTP and WebSocket clients. Choose the one that fits your needs:
// HTTP Client:
// - Best for serverless functions and Lambda environments
// - Ideal for stateless operations and quick queries
// - Lower overhead for single queries
// - Better for applications with sporadic database access
export const drizzleClientHttp = drizzleHttp({ client: sql });
// WebSocket Client:
// - Best for long-running applications (like servers)
// - Maintains a persistent connection
// - More efficient for multiple sequential queries
// - Better for high-frequency database operations
export const drizzleClientWs = drizzleWs({ client: pool });
```
> If you are using `prisma` with the standard Postgres wire protocol (not the Neon serverless adapter), refer to the **Other drivers** section.
Using Prisma with Neon’s serverless adapters requires a similar setup to the one used for the Neon serverless driver directly: configure `neonConfig` to point to your local Neon Local proxy.
1. Install Dependencies
```bash
npm install @prisma/client @prisma/adapter-neon @neondatabase/serverless ws
```
```bash
yarn add @prisma/client @prisma/adapter-neon @neondatabase/serverless ws
```
```bash
pnpm add @prisma/client @prisma/adapter-neon @neondatabase/serverless ws
```
2. **Enable the Preview Flag**
To use the Neon serverless driver with Prisma, enable the preview flag in your `schema.prisma` file.
```prisma
// schema.prisma
generator client {
provider = "prisma-client-js"
previewFeatures = ["driverAdapters"]
}
```
3. **Configure the connection**
```typescript
import { neonConfig } from '@neondatabase/serverless';
import { PrismaNeon, PrismaNeonHTTP } from '@prisma/adapter-neon';
import { PrismaClient } from './generated/prisma/client.js';
import ws from 'ws';
const connectionString =
process.env.DATABASE_URL || 'postgres://neon:npg@localhost:5432/';
if (process.env.NODE_ENV === 'development') {
// Point the serverless driver to the local proxy
neonConfig.fetchEndpoint = 'http://localhost:5432/sql';
neonConfig.poolQueryViaFetch = true;
}
// Use the WebSocket constructor for Node.js
neonConfig.webSocketConstructor = ws;
// Prisma supports both HTTP and WebSocket clients. Choose the one that fits your needs:
// HTTP Client:
// - Ideal for stateless operations and quick queries
// - Lower overhead for single queries
const adapterHttp = new PrismaNeonHTTP(connectionString, {});
export const prismaClientHttp = new PrismaClient({ adapter: adapterHttp });
// WebSocket Client:
// - Best for long-running applications (like servers)
// - Maintains a persistent connection
// - More efficient for multiple sequential queries
// - Better for high-frequency database operations
const adapterWs = new PrismaNeon({ connectionString });
export const prismaClientWs = new PrismaClient({ adapter: adapterWs });
```
Standard PostgreSQL drivers like `node-postgres` (`pg`) do not require major changes because they communicate over the standard Postgres wire protocol. Neon Local exposes a standard Postgres endpoint on `localhost:5432`.
The only change needed is to switch the connection string and adjust the SSL setting. SSL is required for production connections to Neon but is not needed for the local proxy.
```typescript
import { Client, Pool } from 'pg';
const connectionString =
process.env.DATABASE_URL || 'postgres://neon:npg@localhost:5432/';
let sslConfig;
if (process.env.NODE_ENV === 'development') {
sslConfig = { rejectUnauthorized: false };
}
const pool = new Pool({
connectionString,
ssl: sslConfig,
});
const client = new Client({
connectionString,
ssl: sslConfig,
});
export { pool, client };
```
For **Drizzle ORM** using the standard Postgres driver is straightforward. You simply configure the connection string and SSL settings based on your environment:
```typescript
import { drizzle } from 'drizzle-orm/node-postgres';
let connectionString =
process.env.DATABASE_URL || 'postgres://neon:npg@localhost:5432/';
let sslConfig;
if (process.env.NODE_ENV === 'development') {
sslConfig = { rejectUnauthorized: false };
}
export const drizzleClient = drizzle({
connection: {
connectionString,
ssl: sslConfig,
},
});
```
For **Prisma** with the standard Postgres driver you again only need to set the database URL appropriately for your environment. Prisma will handle the rest:
```typescript
import { PrismaClient } from './generated/prisma/client.js';
const prismaClient = new PrismaClient({
datasources: {
db: {
url: process.env.DATABASE_URL || 'postgres://neon:npg@localhost:5432/',
},
},
});
```
- In any case, use the local Neon Local connection string for development and your production Neon connection string in deployed environments.
- Conditionally disabling SSL for local development ensures compatibility with the Neon Local proxy, while production connections remain secure.
The `neonConfig` setup is **exclusive to the `@neondatabase/serverless` driver** and its wrappers (Drizzle, Prisma adapter) in Node.js environments.
For applications written in other languages (like Python, Go, Ruby, Java, etc.) that use standard PostgreSQL drivers, you can follow the same pattern as the `node-postgres (pg)` example:
1. Read the database connection string from an environment variable.
2. In your local development environment, set this variable to `postgres://neon:npg@localhost:5432/`.
3. In production, set it to your real Neon connection string.
4. You may need to conditionally disable SSL for the local connection.
No other code modifications are necessary.
## Summary
You've now learned how to integrate Neon local and Neon Local Connect into your workflow. With Neon Local Connect, you get a full-featured database IDE that makes managing branches as easy as managing Git branches. For more advanced or automated setups, Neon Local with Docker provides the same powerful capabilities for any environment, ensuring you always have clean, isolated, and production-like databases for development and testing.
## Resources
- [Neon Local Documentation](/docs/local/neon-local)
- [Neon Local Connect extension guide](/docs/local/neon-local-vscode)
- [Example application using Neon Local](https://github.com/neondatabase-labs/neon-local-example-react-express-application)